HELK: Manually Import Windows Event Logs
Most logging solutions are set up to facilitate capture and storage of log data from live systems either sending logs to the server or by agents handling the log transportation. HELK is no different. However, once in a while it may be necessary to import log data manually. This walk through provides a set of basic instructions on how to do just that.
First, HELK is a relatively new collection tool with a focus on hunting for bad things within an environment. I’ve only just begun to use this platform but so far things are promising… now if they could fully integrate Wazuh dashboards and agents! =) Alas, I digress…
It goes without saying that you should start this with a functional HELK installation. You’ll also need python and pip, but those are covered in the import utility instructions.
To start, you’ll need to update the firewall rules on your HELK installation. By default port 9200 (elasticsearch) is blocked as it is part of a docker container behind the platform functionality. To update these you should start by finding your container id.
docker container list
The ID should be in the first column of the results. Next, you’ll want to find the IP address associated with that container by the following command.
docker inspect -f '{{range .NetworkSettings.Networks}}{{.IPAddress}}{{end}}' CONTAINERID
Now you should be able to add a new firewall rule into IP tables that should open port 9200 to you.
iptables -A DOCKER -p tcp -m tcp --dport 9200 -s 0.0.0.0/0 -d YOURCONTAINERIP -j ACCEPT
Once complete you should be able to show your firewall rules in iptables and see a new rule allowing your port 9200 to your docker IP address.
iptables -L -n
Next, you’ll need to install an import utility. In this case I’ve used one provided by Dragos. (A huge THANK YOU to them for this amazing piece of time-saving work!) You can find it at the link below:
https://dragos.com/blog/industry-news/evtxtoelk-a-python-module-to-load-windows-event-logs-into-elasticsearch/
NOTE: You will likely need to follow the instructions using Python3. With my latest installation (August 2019) a standard Python2 installation may not complete.
The final part is where you will likely need to modify the instructions a bit to suite your installation. Change the following to use your container IP instead.
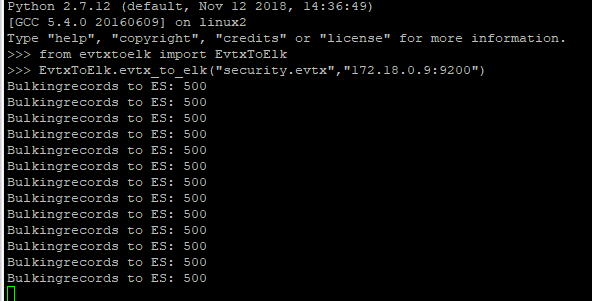
from evtxtoelk import EvtxToElk
EvtxToElk.evtx_to_elk(“Security.evtx”,”http://YOURCONTAINERIP:9200″)
It’s also worth noting that the imports that I’ve completed have been done from the command-line of the server with the log files directly accessible at that level. Once things are working you should see results similar to those below.
Good hunting!


0 Comments